Wednesday, December 26, 2012

Salted Caramel Hot Chocolate Mix


For Christmas this year I made a few different goodies to hand out, mostly candy types. My kids love hot cocoa and often love to get into the can of cocoa and make the recipe from the back. Well I thought this would be a nice treat to have on hand, ready to measure out saving any messes they make. This was really great, I used 1 1/2 TBL of salt not the full amount in the original recipe, I'm not a salty fan of most foods. You can still taste it just fine. Making the caramel is easy however you will need a food processor to pulverize it into powder, which almost killed mine, poor machine lol. I gave away this to family as gifts since it makes a lot.


Salted Caramel Hot Chocolate Mix
From Pennies on a Platter
Yield: 32 servings

2 1/2 cups granulated sugar
3 tablespoons pure vanilla extract
1 1/2 cups good quality cocoa powder
1 to 3 tablespoons good sea salt (My preference is 1 1/2 TBL)
1 cup dry milk powder
3/4 cup packed light brown sugar
10 ounces good quality bittersweet chocolate or chocolate chips

Line a rimmed baking sheet with parchment paper (or use your silpat); set aside. Heat the 2 1/2 cups granulated sugar in a large heavy pan, over medium heat, without stirring. When the sugar begins to melt, take the handle of the pan and swirl it to melt without burning. The sugar might seem to crystallize, but it will eventually melt to a deep amber color. (Can take 15-20 minutes, so be patient.)

Remove the pan from the heat and carefully add the vanilla. Whisk the caramel until smooth again, then immediately pour it onto the lined baking sheet. Allow it to spread without touching it. Set aside and let the caramel harden, at least 1 hour (mine took less time).

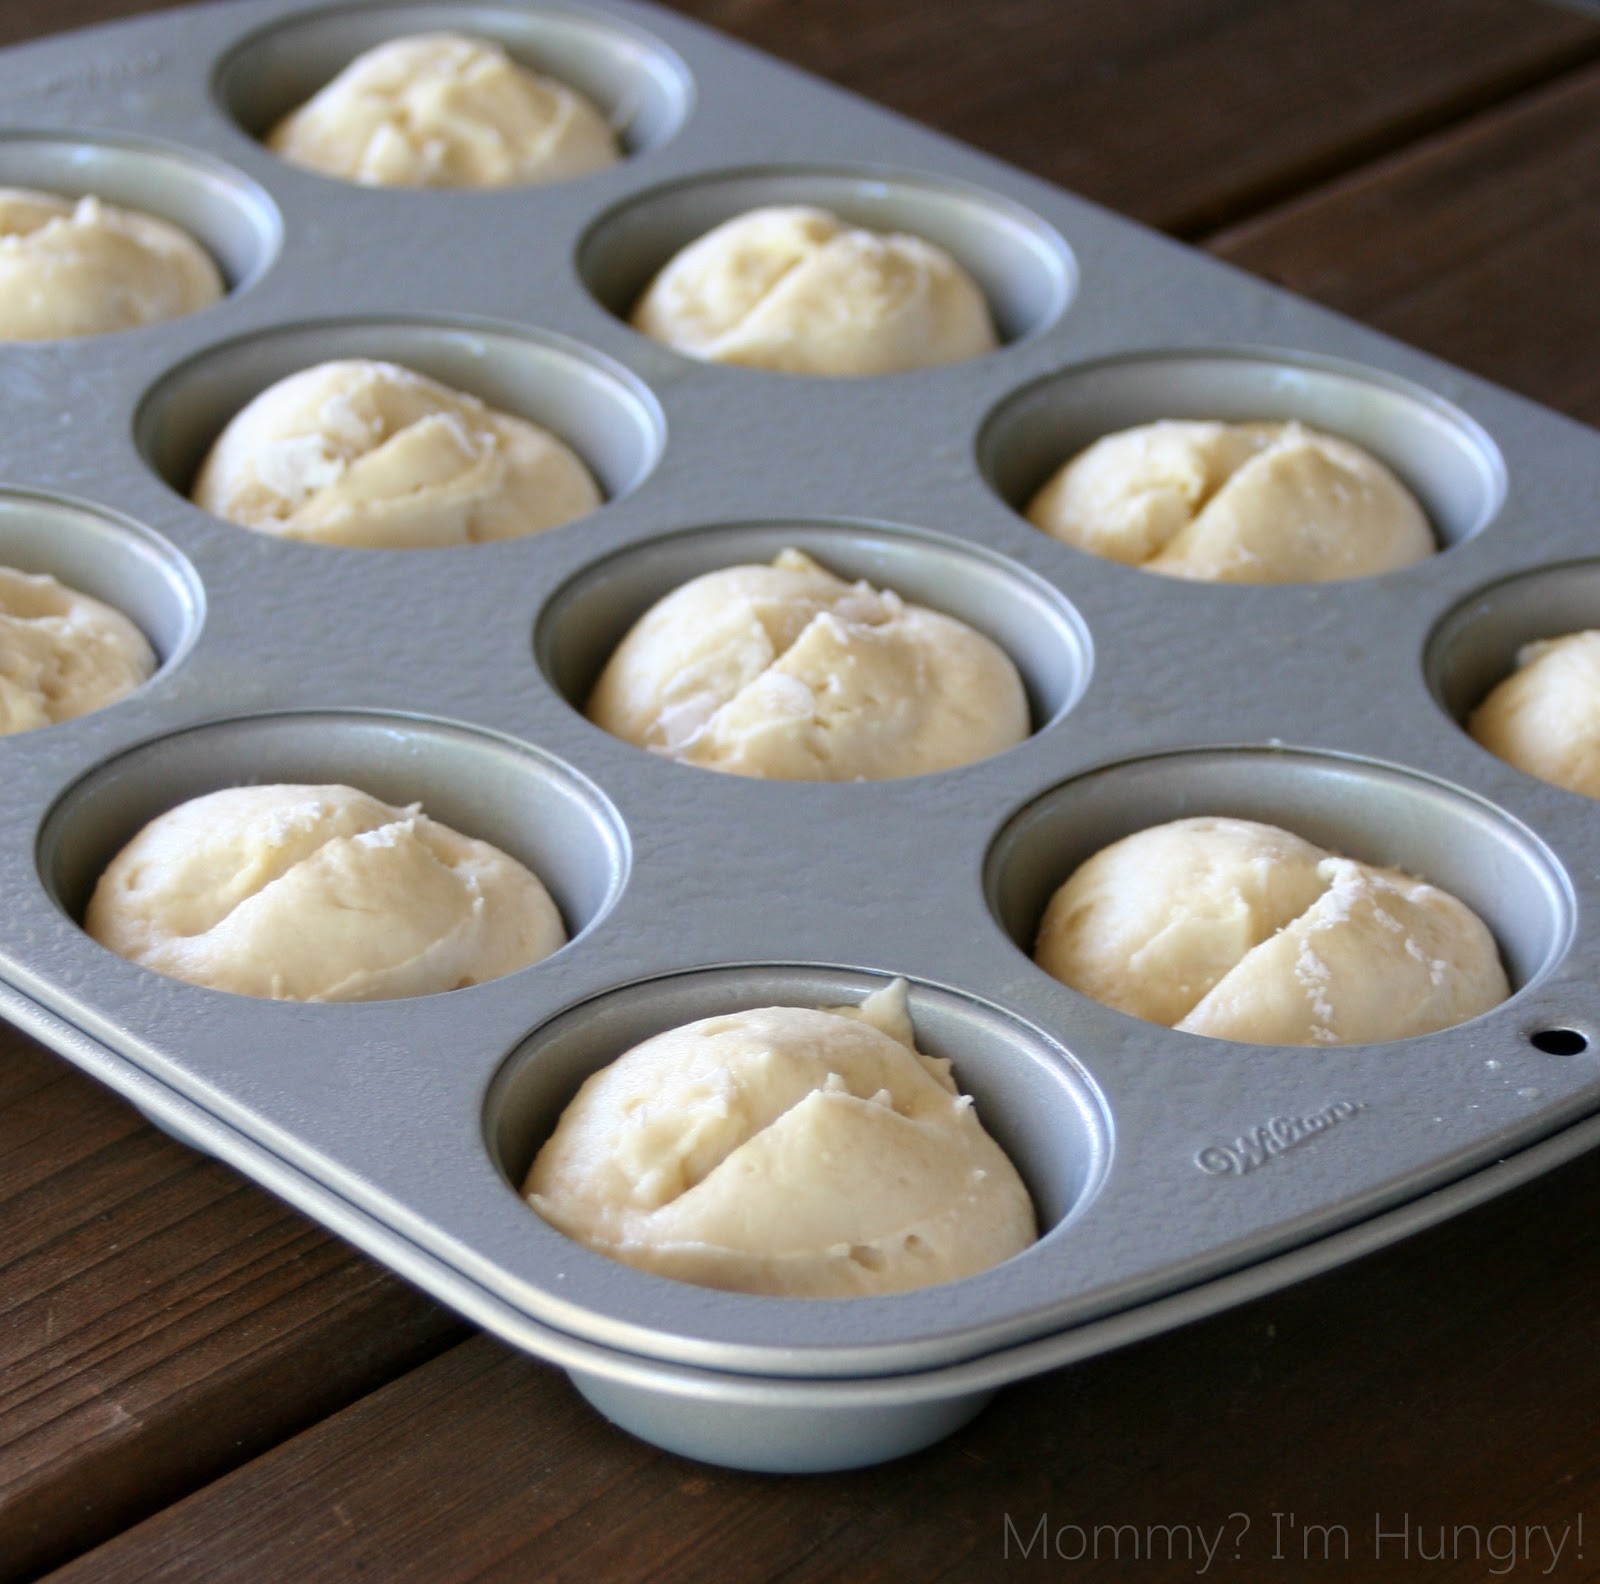
When ready to make the mix, use the back of a large spoon to tap the caramel several times into small broken pieces that can fit into the feeding tube of a large food processor. Turn the processor on, and while running, feed the caramel pieces into the tube so the processor pulverizes the caramel into a fine powder. Continue to add the pieces, a few at a time, until it is completely powder (a cloud of caramel dust will float out of the tube and it will sound like it's going to break your machine lol). Turn the processor off and follow the next steps to complete the mix.

Add the rest of the ingredients, except the chocolate, into the food processor with the caramel powder. Replace the lid and process until smooth. Add the chocolate to the bowl and process again until the mixture is a fine powder.

Store in an airtight container, in a cool, dry place for up to one month. To serve, stir 3 tablespoons mix into 1 cup hot milk.

caramel ready to harden


caramel being pulverized into powder

caramel powder


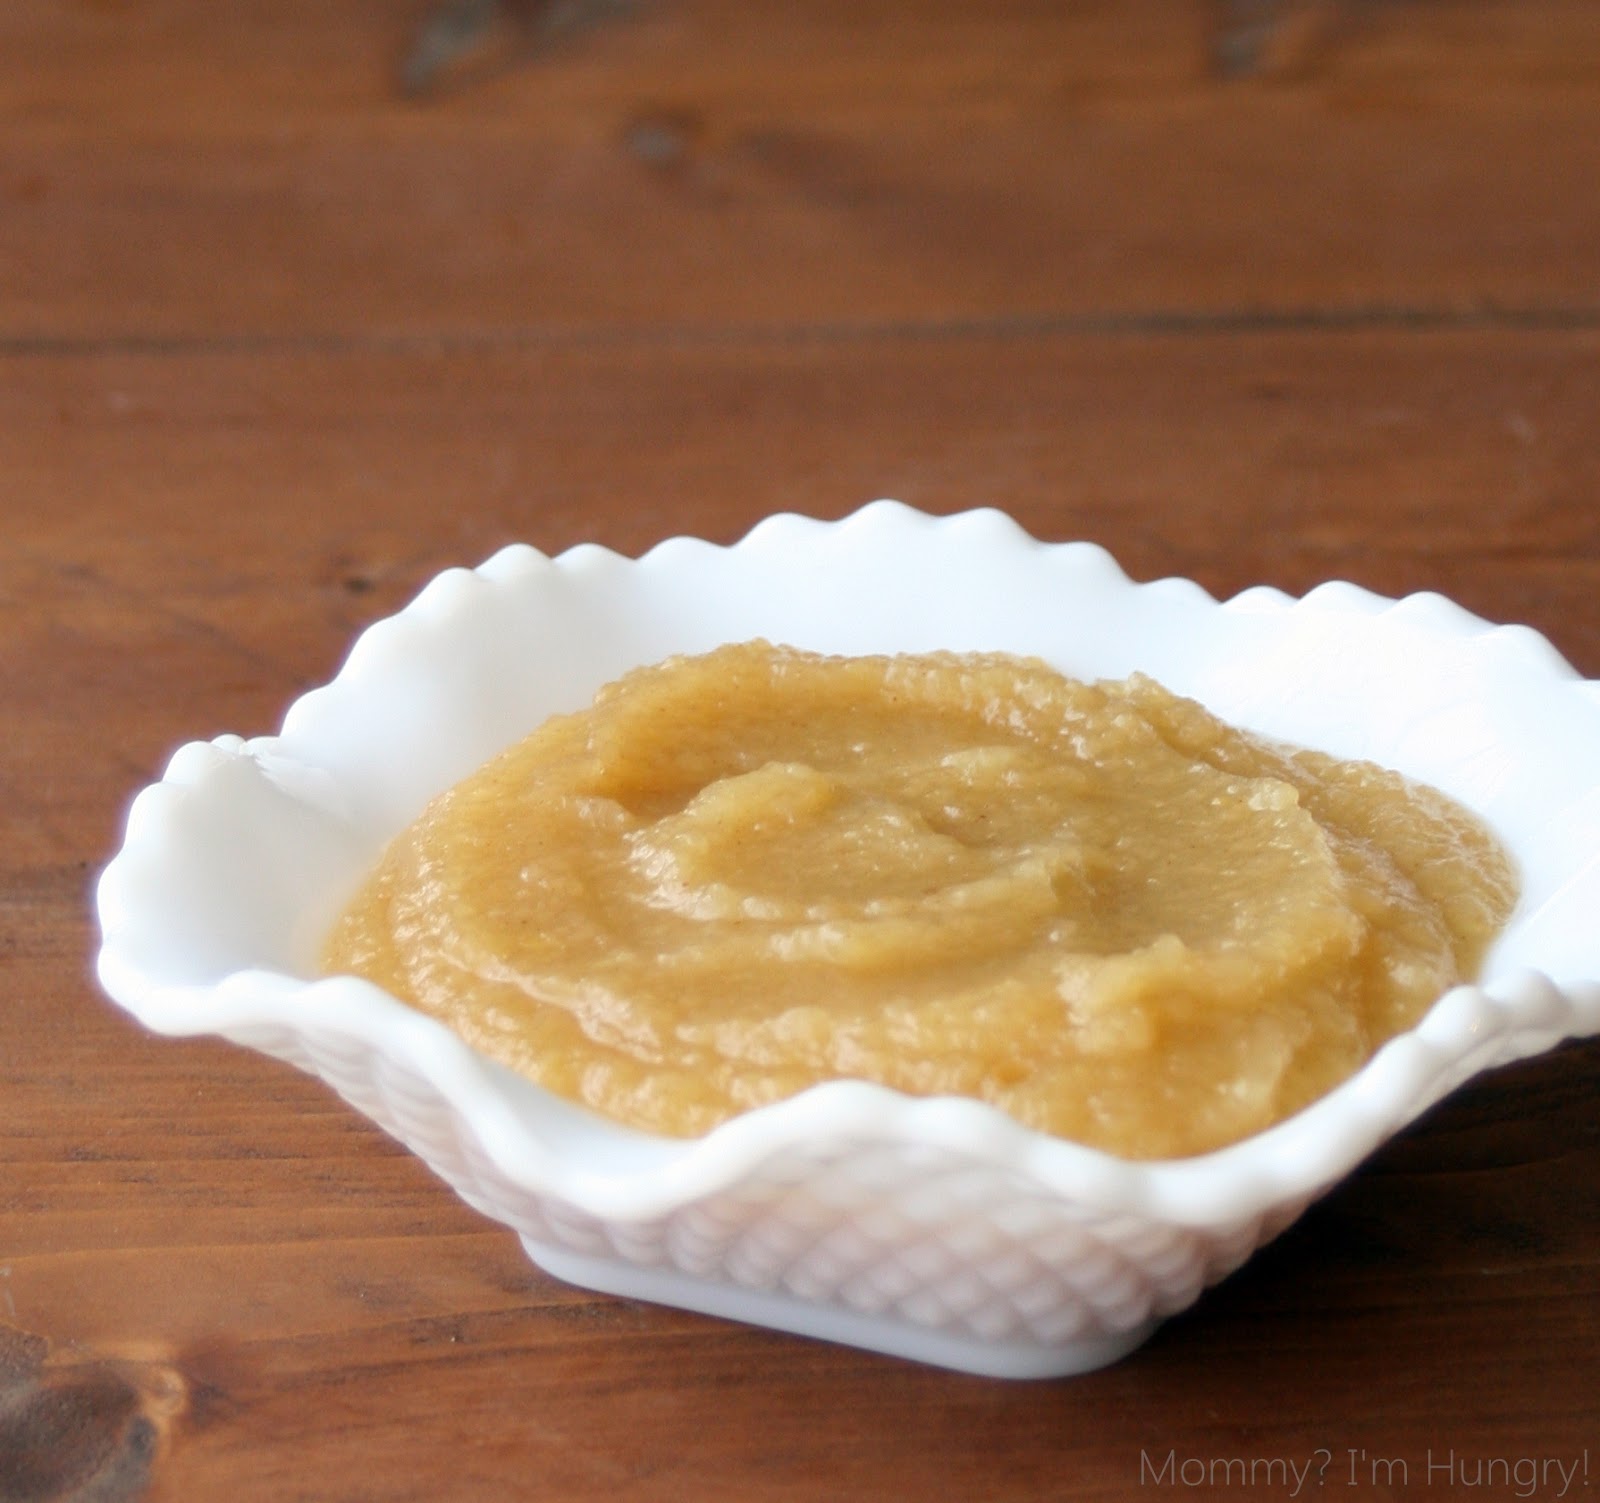
time to enjoy a cup on this cold morning


Please share this post if you liked it. =)

enjoy,
Pin It!

Monday, November 19, 2012

Gluten Free Dinner Rolls


Oh my goodness!! I am so glad I finally tried this recipe out. I started my Thanksgiving prep early this year, and wanted gluten free rolls just so I can have my favorite leftover turkey & cranberry sandwich. So I made these, baked and froze ahead of time. These rolls must be what they serve in Heaven ;) they are SO good, so light and fluffy! I don't know what it is, but yeast breads sort of dislike me, they go flat during their baking, but they still tasted good so I don't mind. I'll have to try these as burger buns sometime too. This gluten free AP flour mix is what I keep on hand, this is where my fave GF pie crust recipe comes from too.


Gluten Free Dinner Rolls
makes about 18 rolls, adapted from The Art of Gluten Free Baking

Note: this recipe uses Jeanne’s Gluten-Free All-Purpose Flour Mix (mix together and store in a cool, dark place):
1 1/4 C (170g) brown rice flour
1 1/4 C (205g) white rice flour
1 C (120g) tapioca flour
1 C (165g) sweet rice flour (aka Mochiko)
2 scant tsp. xanthan gum

Ingredients:
3 C (420g) Jeanne’s Gluten-Free All-Purpose Flour Mix, above
2 tsp xanthan gum (this is in addition to the xanthan gum in the mix)
4 tsp baking powder
1 tsp salt
1/4 C (50g) sugar
2 TBL active dry yeast
2 C (475ml) warm but not hot milk
2 tsp apple cider vinegar
2 large or extra large eggs
1/4 C (60ml) olive oil (or neutral oil)
melted butter for pans and for brushing tops of rolls
tapioca flour for pans

Butter and flour muffin tins.
In a small bowl, whisk 1 TBL of the sugar into warm milk. Add yeast, whisk to dissolve; set aside to proof (start the yeast working)–it will get foamy on the top.

In a medium bowl, mix together flour, xanthan gum, baking powder, the remaining sugar, and salt; set aside.
In bowl of mixer fitted with a paddle attachment, beat together eggs, vinegar and oil. Add yeast mixture, beat to mix. Add flour mixture, beat on low to combine, then beat on high for about 3 minutes.

Spoon dough into prepared muffin tins–filling about 3/4 of each cup full (I use my ice cream scooper). With a sharp knife that has been dipped in tapioca flour, cut a deep slash in the top of each roll
Don’t worry if there’s a little extra tapioca flour left on the rolls.

Turn on oven to preheat to 375 degrees.
Let rise until doubled in bulk–about 40 mins. I put muffin tins on top of stove to let dough rise in proximity to warmth of the preheating stove.

Once rolls have risen, brush the top of each with melted butter. Bake in preheated oven for about 20 minutes–until the tops are a nice golden brown. If they start to brown too quickly, loosely tent the rolls with aluminum foil.
Remove from oven. Release rolls from tins. Enjoy!

*Note: you can also make these into buns by dropping large spoonfuls of dough onto a greased cookie sheet. Follow rising and baking instructions for the muffin-tin rolls.
*Mochiko is often found in the Asian food aisle of the grocery store.


ready to rise 


Please share this post if you liked it. =)

enjoy,
Pin It!

Sunday, November 11, 2012

Easy Homemade Applesauce


We LOVE applsauce with pork and I was always forgetting to buy it so I made it with some ugly apples I had leftover one day, they LOVED it! This is such a super simple delicious recipe why would I buy it anymore? I've adapted this recipe and left out the sugar, it does not need it since the apples are sweet enough. I also add just a little flavoring but you can add more if you like.


Easy Homemade Applesauce
adapted from Allrecipes

Large batch 12+ servings:
6 lbs (12-16) apples, peeled, cored and chopped (fuji, gala)
2 C water
pinch cinnamon
pinch nutmeg
pinch salt

Combine all in a medium saucepan and bring to boil, then cover and cook on low-simmer for 25 minutes until apples are soft. Allow to cool slightly then add to a processor to puree to your desired texture.


Smaller batch 4+ servings:
4 medium size apples, peeled, cored and chopped
3/4 C water
pinch cinnamon
pinch nutmeg
pinch salt

Combine all in a medium saucepan and bring to boil, then cover and cook on low-simmer for 25 minutes until apples are soft. Allow to cool slightly then add to a processor to puree to your desired texture.

Photo by mommyimhungry • Instagram


Please share this post if you liked it. =)
enjoy,

Pin It!

Saturday, November 10, 2012

Crock-Pot Beef Stew


I have been making this beef stew for over 15 years now. It came from my favorite recipe cards back in the 90s. I have adapted it to use the crock-pot and more veggies. It's perfect for the cooler weather now.


Crock-Pot Beef Stew
aka Early Autumn Stew, adapted from Healthy Meals in Minutes recipe cards

2 tsp oil
2 pounds chuck roast, cut into 1" cubes
2 TBL flour (gluten free)
1 tsp dried thyme
1/2 tsp ground sage
6 Cups low sodium beef broth (gluten free)
1 bay leaf
1 lb carrots, cut into 2" pieces
2 Cups mushrooms, sliced
1 white onion, chopped
4 stalks celery, sliced
1 lb. potatoes, quatered
1/8 tsp salt
1/8 tsp pepper

In a large skillet, heat oil, add beef and saute until browned. Sprinkle with flour, thyme and sage, saute for 2 minutes.
Add broth, bay leaf, all veggies, salt and pepper along with seared beef to your slow cooker pot. Cook on low 6-8 hours.


Please share this post if you liked it. =)

enjoy,
Pin It!

Monday, November 5, 2012

Savory Bacon and Corn Pancakes


Wow wow wow! I changed up dinner for breakfast with these savory pancakes. I've had Lori's recipe pinned forever now and finally made them. Bacon, onions, corn and cheese in your favorite pancake batter with sweet maple syrup. The flavors are wonderful in these, except they did not care for the corn, next time no corn lol. I loved them. (for more gorgeous pics of these, check out Lori's post)


Savory Bacon & Corn Pancakes
adapted from Recipe Girl

1 lb bacon, cut into 1/2-inch pieces
1 small finely chopped sweet vidalia onion
1 1/2 c flour
3 1/2 tsp baking powder
1 tsp salt
1/8 teaspoon cayenne pepper
4 tablespoons chopped fresh chives
1 1/2 c milk or buttermilk, warmed slightly
1 egg, room temp
3 Tbls butter, melted
1-2 cups frozen corn, thawed
1-2 cups shredded Monterey Jack cheese
Warm maple syrup, for serving

In a medium skillet, cook the bacon pieces until they begin to brown. Add the onion and continue to cook until the bacon is crisp and the onion is softened. Scoop out a heaping tablespoon of the bacon mixture for topping the griddle cakes upon serving- and set it aside.

While the bacon is cooking, combine the flour, baking powder, salt, cayenne, chives in a medium bowl. Stir in the milk, egg and butter, just until moistened. Stir in the bacon mixture, corn and cheese. The mixture will be thick. If you'd like the griddle cakes to be slightly thinner, add a little more milk to thin out the batter.
(I used a batch of my gluten free pancake mix (omitted sugar & chocolate chips) and added some of the corn and bacon mix to it)

Heat and grease a griddle or large skillet. Pour a heaping 1/4-cup of the batter onto the griddle and cook until it is golden brown- 3 to 4 minutes per side. Repeat with the remaining batter.

Serve stacks of griddle cakes topped with a sprinkle of the reserved bacon/onion and warm maple syrup.

I did freeze leftovers, then heated them back up in the hot oven.

Mmm, bacon & onion mixture

Pancakes for them (on my large griddle)
 
Gluten free pancakes for me (in my small skillet)

A couple of months ago I was able to attend a Foster Farms Chicken Cook Off and San Diego's very own Recipe Girl's Lori was there to help judge.
 

Please share this post if you liked it. =)
enjoy,

Pin It!

Sunday, November 4, 2012

Oven Tacos


Thought we'd give these oven tacos a try, something new. Actually the thought of having it half way assembled sounded pretty good, it's hard to fill a taco shell sometimes, especially little hands. This way the meat mixture and cheese is baked into the shell so spillage is eliminated. A bonus to these delicious tacos is the shell doesn't crack all over the place when eating either. I read in comments that some turned out soggy, but mine did not, I guess I let the meat mixture cook down a little more? The shells will be softer but not in a bad way. We loved them, the meat mixture was very good.


Oven Tacos
adapted from Blog Chef

2 lbs ground beef (or turkey/chicken)
1 small onion diced
1 small can diced green chilies
1 recipe for Homemade taco seasoning (below)
1 (8 ounce) can low sodium tomato sauce
1 (16 ounce) can fat free refried beans
2 cups shredded reduced fat Colby-jack cheese
18-20 hard taco shells {if gluten free, be sure they are}

Optional Condiments-
Lettuce (shredded)
Tomato (diced)
Salsa
Guacamole
Sour Cream
Olives, sliced 

Preheat the oven to 400 degrees. 

In a large skillet brown ground beef and onion over medium-high heat. Drain off any excess liquid. Return to pan, add chilies, refried beans, tomato sauce, and taco seasoning. Mix well and cook for a few minutes if mixture seems runny.

Spoon the taco meat mixture into the taco shells and place into a 9 x 13 inch baking dish (OR check out The Taco Rack), standing up. Sprinkle cheese over the top of the taco meat in each shell. Place into the oven and bake at 400 degrees for 10-12 minutes or until the cheese has melted and the tacos are heated through.
Remove from the oven and top with any optional condiments for serving.

Taco Seasoning
1 tablespoon chili powder
1/4 teaspoon garlic powder
1/4 teaspoon onion powder
1/4 teaspoon crushed red pepper flakes
1/4 teaspoon dried oregano
1/2 teaspoon paprika
1 1/2 teaspoons ground cumin
1 teaspoon sea salt
1 teaspoon black pepper

In a small bowl, mix all together. Store in an airtight container.
I used all of this on 2 lbs of ground meat with a little water mixed in.


Please share this post if you liked it. =)
enjoy,

Pin It!

Friday, November 2, 2012

N'oatmeal for Breakfast


Whoo hoo! I have missed oatmeal since going gluten free one year ago (yes I know there are GF oats, but I've sort of gave up oats for the most part). I came across this N'oatmeal breakfast on Instagram, and found there are quite a few different recipes. I found this recipe and loved it the most. It's not thick and clumpy like oatmeal, it's more like a creamy hot porridge like cream of wheat (we called it mush growing up lol). It will make enough for 2 breakfasts, I can quickly heat up a leftover one before a workout if I want.
Check out the Pumpkin N'oatmeal I made also, which reminded me more of a warm pumpkin custard.


N'oatmeal
adapated from Mark's Daily Apple

1 small handful of walnuts
1 small handful of almonds
2 tablespoons ground flax seed
1/2 – 1 teaspoon ground cinnamon
1 pinch of ground nutmeg
1 tablespoon almond butter
1 banana, mashed
3 whole eggs
1/4 cup coconut milk (I use canned)
splash of vanilla
2 teaspoons chopped nuts
1 handful fresh berries or fruit

Add walnuts, almonds, flax seed and spices to a food processor and pulse it down to a course grain, making sure to stop before it’s totally ground into a powder. Set aside.

In a medium saucepan, whisk together eggs, coconut milk and vanilla until the consistency thickens a little bit into a loose custard. Thoroughly blend together the mashed banana and almond butter and add it to the custard, mixing well. Stir in the nut mixture. Heat over medium heat, stirring until the “no-atmeal” reaches your desired consistency; this should only take a few minutes. Sprinkle additional nuts and berries on top. Add more milk if you want.


Please share this post if you liked it and repin to save in your folder. =)

enjoy,
Pin It!

Thursday, October 25, 2012

Gluten Free Spice Cake with a Pumpkin Buttercream


This is a very soft delicious gluten free spice cake with a pumpkin buttercream. However, I wasn't fond of the buttercream, not enough pumpkin flavor to me and buttercream is not my fave. Next time I'll make a pumpkin cream cheese frosting for it. I doubled the buttercream and could not wait for it to set up, so my layers slid in my photos, haha. Another recipe my family could not tell was gluten free, we all loved it!


Gluten Free Spice Cake with a Pumpkin Buttercream
from Stuffed Pepper

CAKE
2 cups GF Flour Mix*
1 teaspoon xanthan gum
1 ½ teaspoons baking powder
1 teaspoon baking soda
1 ½ teaspoons cinnamon
½ teaspoon allspice
¼ teaspoon nutmeg
1 teaspoon cocoa powder
½ teaspoon salt
½ cup unsalted butter, room temperature
1 ½ cup brown sugar, packed
2 eggs
1 teaspoons vanilla
1 cup sour cream

BUTTERCREAM
4 tablespoons unsalted butter, room temperature
2 tablespoons pumpkin puree
½ teaspoon cinnamon
½ teaspoon vanilla
2-3 cups powdered sugar, sifted
2 teaspoons milk

Preheat oven to 350°F. Spray two 9-inch cake pans with cooking spray and line the bottoms with parchment paper.

To prepare the cake, whisk together the first 9 ingredients in a medium-sized bowl. Set aside.

In a separate bowl, cream together the butter and brown sugar, about 2-3 minutes on medium speed. Add in eggs, one at a time, mixing well in between each. Beat in the vanilla. Next, add in the dry ingredients in three separate additions, alternating with the sour cream. Mix well in between each addition.

Divide batter between the two prepared cake pans and bake for 25 minutes, or until a toothpick inserted in the center of each cake comes out clean. Let cakes cool completely.

To prepare the buttercream filling, beat butter until creamy, about 1-2 minutes. Add in the pumpkin, cinnamon, and vanilla, and mix completely. Slowly add in 2 cups of powdered sugar followed by the milk. Adjust to your personal taste and texture preferences, adding more powdered sugar for a sweeter, firmer filling.

Assemble the cakes by placing one cake layer, bottom side facing up, on a plate. Completely cover the upward-facing layer with the pumpkin buttercream. Place the second cake layer on top of buttercream filling, the top facing up. Finish cake with powdered sugar for decoration, if desired.

*GF Flour Mix
2 cups brown rice flour
2/3 cup potato starch
1/3 cup tapioca starch

 
perhaps you got a sneak peek on instagram? :)


Please share this post if you liked it. =)

enjoy,

Pin It!

Wednesday, October 17, 2012

Red Velvet Cheesecake Cake


We recently had a birthday in our family, the big 15! She loves cheesecake and red velvet cake so when I saw this, I was happy she wanted it. I made this in 3 days, different stages (I didn't want to be rushed) so keep that in mind if you decide to make one too. For mine, I decided to do a cream cheese frosting, decorated as roses, something new for me, any little spaces I filled in with a flower dollop. This went over so well, family raved about it, AND some had seconds!! No, I couldn't have any, but that's ok my birthday is next and I WILL have cake. :)


Red Velvet Cheesecake Cake
Recipe by: Willow Bird Baking Yield: 11-13 pieces

Crust Ingredients:
32 chocolate cream sandwich cookies, finely processed into crumbs
5 1/3 tablespoons unsalted butter, melted and cooled
Small pinch of salt

Ganache Ingredients:
3/4 cups heavy cream
10 oz. semisweet chocolate, finely chopped

Cake Ingredients:
1/4 cup vegetable shortening
1 egg
1 tablespoon cocoa
1/4 teaspoon salt
3/4 cups sugar
1/2 teaspoon vanilla extract
1/2 cup buttermilk
1 1/4 cups flour
1/2 teaspoon baking soda
1/2 tablespoon white vinegar
1 ounce red food coloring

Filling Ingredients:
3 (8 oz.) packages cream cheese, at room temperature
1 cup sugar
1½ tablespoons all-purpose flour
2 teaspoons vanilla extract
3 large eggs

Note on scheduling: This cake is easily separated into two days of preparation, and can be prepared ahead of time. On day one, prepare the red velvet cake, cool it, and freeze it. On day two, prepare the cheesecake. You can then assemble and decorate right away, or leave this for day three.

Make the cake:
Preheat oven to 350 degrees F. Line the bottom and the sides of an 9-inch round cake pan (I used my springform pan) with parchment paper, leaving an overhang on two opposite sides to make it easier to lift the cake out of the pan when it’s done. Cream shortening, sugar, and eggs. Make a paste of the cocoa and coloring and add to the shortening mixture. Add salt and vanilla. Add buttermilk alternately with the flour, beginning and ending with flour. Mix vinegar and soda right before using and add to mixture by folding in. Pour batter into the cake pan and bake at 350 degrees for 20-25 minutes, or until a toothpick inserted into the center of the cake comes out clean. Cool completely, cover in wax paper, and freeze for 30 minutes or until firm.

Make the cheesecake:
To make the crust, preheat the oven to 350˚ F. Butter a 9-inch springform pan and place it on a baking sheet. Combine the chocolate cookie crumbs, melted butter and salt in a small bowl. Toss with a fork to moisten all of the crumbs. Press into a thin layer covering the bottom and sides of the springform pan (at least 3 inches up the sides).

Make the ganache:
Bring the cream to a simmer in a medium saucepan. Place the chocolate in a medium bowl. Once the cream reaches a simmer, pour the cream over the chocolate and let stand 1-2 minutes. Whisk in small circles until a smooth ganache has formed. Pour 1 – 1.5 cups of the ganache over the bottom of the crust. Freeze until the ganache layer is firm, about 30 minutes. Reserve the remaining ganache for garnishing if desired; cover and let stand at room temperature for later decorating.

Preheat the oven to 350˚ F and position a rack in the middle of the oven. In the bowl of an electric mixer fitted with the paddle attachment, beat the cream cheese and sugar on medium-high speed until well blended. Beat in the flour. Add in the vanilla and beat until well incorporated, scraping down the sides of the bowl as needed. Beat in the eggs one at a time, scraping down the bowl between each addition.

Pour the filling over the cold ganache in the crust. Place the springform pan on a rimmed baking sheet. Bake until the top is lightly browned, puffed and cracked at the edges, and the center moves only very slightly when the pan is lightly shaken, about 1 hour. Transfer to a wire cooling rack. Cool at room temperature for at least 30 minutes. Transfer to the refrigerator and let cool at least 3 hours, until completely chilled and set (it’ll sink as it cools).

Assemble the cheesecake:
Carefully remove the cheesecake from the springform. Transfer the cake to a serving platter. . Then place your red velvet cake layer on top of cheesecake (right side up). If for some reason you seem that your cake layer will stick up beyond your crust, you can use a long serrated knife to reduce its width (freezing it first makes it easier to cut). Decorate top of cake as desired. (I used a double batch of cream cheese frosting in roses).


Please share this post if you liked it. =)

enjoy,
Pin It!

Monday, October 1, 2012

Gluten Free Jalapeno Cornbread


This will be my go to cornbread for now on, and I can even say Mr. loved it!! I added in a diced jalapeno and it was just right in this. I like to drizzle some honey over the top when it comes out of the oven. We had this along side some enchiladas.

Gluten Free Jalapeno Cornbread
adapted from Gluten Free Mommy

1 cup white rice flour
3/4 cup stone-ground cornmeal
2 to 3 Tablespoons of sugar
2 1/2 teaspoons baking powder
3/4 teaspoon salt
1 Tablespoon butter
2 beaten eggs
1 cup milk
1/4 cup melted butter
1 jalapeno, diced
*You may also stir in 1 cup shredded cheddar and 1/2 cup thawed frozen corn to the batter if you like.


 Preheat the oven to 400 degrees. Mix the dry ingredients together in a med. bowl and set aside. Melt the one tablespoon of butter in a 10 inch cast-iron skillet or 8/9 inch round baking pan in the oven. This takes about three minutes. Swirl the butter around the pan coating the bottom and sides. In a small bowl, combine the eggs, milk, 1/4 cup butter and jalapeno. Add this mixture all at once to the flour mixture and stir until just moistened. Pour batter into the hot skillet or baking pan. Bake for 15-20 minutes or until a wooden toothpick comes out clean. Serve warm.

*These will also make 14 muffins. I just melted all the butter and added it to the egg mixture, added corn and cheese, sprayed my muffin tin and baked for 25 minutes.


done as muffins


Please share this post if you liked it. =)
enjoy,

Pin It!

Friday, September 21, 2012

Fried Rice


I love fried rice, but sadly can't eat it from take away anymore since I doubt they have a gluten free option, SO I make my own. I have combined two of my fave recipes to one I like. You could call this leftover rice, since it's best made with day old rice, meats and with frozen veggies it comes together quickly. I have been making this for a while now and meant to blog it, so after I made this for dinner tonight, I sat my butt down and wrote this for you. (these photos are from last July!! I've been hiding this recipe from you all since then. lol)


Fried Rice
adapted from Cooking with Kai and Steamy Kitchen

4 Cups cooked leftover rice
1/4 lb thinly sliced or diced raw meat/shrimp/tofu/spam (or use cooked leftovers)
1/4 Cup veggies (frozen peas and carrots)
3 eggs, lightly beaten
2 Tbl cooking oil
3 green onions, sliced for garnish

Sauce
3 Tbl low sodium tamari (soy sauce)
1 tsp sesame oil
2 tsp shaoxing rice wine
2 tsp fish sauce
1 tsp minced garlic
1/2 tsp sugar (optional)

Combine all sauce ingredients, set aside. Add oil to a large hot skillet, cook meat for 2-3 minutes (you could add a little bit of sauce while cooking the meat). Remove from pan and set aside. Add eggs and scramble for about 1 minute. Add in rice, meat and veggies allow to heat through.
Add in the sauce ingredients, allow to heat through. Garnish with green onions.

spam fried rice


Please share this post if you liked it. =)

enjoy,

Pin It!
Related Posts Plugin for WordPress, Blogger...