Sunday, December 29, 2013

Caramel Apple Streusel Cheesecake Bars


These were my treat for my work's Christmas party potluck table. I made two so I could also bring some to family. They all loved it and I wish I made one gluten free so I could have a piece. I have added in gluten free adaptions if you're eating GF. These would be a great dessert for your New Years Eve party!

Caramel Apple Streusel Cheesecake Bars

Crust:
2 cups finely ground graham crackers (could use gluten free)
1/2 teaspoon ground cinnamon
2 TBL granulated sugar
1 stick unsalted butter, melted

Filling:
2 (8-ounce) cream cheese blocks, softened
3 eggs
1 cup granulated sugar
1 pint (16oz) sour cream
1 lemon, zested
2 tsp. vanilla extract 

Topping:
1 can apple pie filling 
1/4 cup caramel sauce/topping
Streusel Topping, recipe follows

Preheat the oven to 325 degrees F. Lightly coat the bottom and sides of a 9x13 with non-stick cooking spray (I also add parchment so that I can pick it up out of the pan for easier cutting).

For the crust:
In a mixing bowl, combine the ingredients with a fork until evenly moistened (I just used my food processor).
Pour the crumbs into the pan and, using the bottom of a measuring cup or the smooth bottom of a glass, press the crumbs down into the base and 1-inch up the sides. Refrigerate for 5 minutes.

For the Filling:
In the bowl of an electric mixer, beat the cream cheese on low speed for 1 minute until smooth and free of any lumps. Add the eggs, 1 at a time, and continue to beat slowly until combined. Gradually add sugar and beat until creamy, for 1 to 2 minutes.

Add sour cream, lemon zest, and vanilla. Periodically scrape down the sides of the bowl and the beaters. The batter should be well-mixed but not over beaten. Pour the filling into the crust-lined pan and smooth the top with a spatula.

Set a large roasting pan with 1" water on bottom oven rack, place cheesecake on middle rack. Bake for 30 minutes. 
In a bowl combine the apple pie filling and caramel.
Carefully add apple topping to the cheesecake then add the streusel topping* and bake for another 30 minutes.

The cheesecake should still jiggle (it will firm up after chilling), so be careful not to overcook. Turn off the oven, crack the door open with a wooden spoon handle and let the cheesecake sit for 30 minutes. 
Remove from oven to cooling rack, let cool in pan for 30 more minutes. Cover with saran wrap and chill in the refrigerator, for at least 4 hours. Cut into bars.

Streusel Topping: 
adapted from Paula Deen
1/2 cup firmly packed brown sugar 
1/2 cup all-purpose flour (could use gluten free blend)
1/4 cup quick cooking oats (could use gluten free)
4 TBL butter, softened 

 In a small bowl, combine all ingredients.


Pin It!

Saturday, December 21, 2013

Eating Our Christmas 2013


Every Christmas I go all out for delicious treats, as a blog follower you probably already know! This year will be no different except for a couple of new treats. Check out the links to the recipes below and I hope you discover a new one to have for your treat! I have many many more Holiday recipes to share just check here and here!


I'll also be making up some Peppermint Crunch Puppy Chow to take on Christmas dinner for munchies and Caramel Apple Cheesecake ( a combination of recipes) for my work's Christmas potluck and of course my Mom's (secret recipe) Rocky Road. Watch my Instagram for these goodies to show up (and for a more current photo lol).

Do you have favorite foods for your Holidays? I'd love to know, please share (recipe links encouraged!) in a comment below. 


Merry Christmas,
Pin It!

Friday, October 18, 2013

General Tso's Tofu


A long time blogging friend, Shelby of Grumpy's Honey Bunch recently posted some of her faves on facebook and this recipe for General Tso's Tofu showed up. I haven't had tofu is a long while so I thought I'd give this a try. I'm always up for Asian foods anyway. I served it up with some gluten free asian rice noodles and veggies. It was delicious and I even saved some to take to work the next day where coworkers were jealous of my lunch. haha. Head over to Shelby's blog and check out all her yummy recipes!

General Tso's Tofu
from Grumpy's Honey Bunch 

1 brick extra firm tofu
4 Tablespoons cornstarch
1 Tablespoon olive oil

Sauce:
1/2 Cup Brown Sugar
3 tbsps Hoisin (I used a GF homemade recipe)
3 Tablespoons seasoned rice vinegar
3 Tablespoons Ketchup
2 Tablespoons Soy Sauce (GF Tamari)
1/2 Cup water
1 Tablespoon Sesame oil
4 green onions, sliced
3 Tbsps fresh ginger, grated
Red pepper flakes, desired amount

Squeeze tofu of excess water by placing between a thickness (I use about 3-4 thick paper towels folded about 3-4 times) of paper towels and sitting a heavy pan on top. Let sit 20-30 minutes. While waiting for tofu to be squeezed dry, mix together the first 6 ingredients and set aside.
To prepare tofu for frying, slice into 1/2" slices, then cut each slice into thirds. Coat lightly with cornstarch and fry in a shallow frying pan with olive oil until browned and crispy. Remove from frying pan and set aside. Wipe pan clean with paper towel and add sesame oil with onions and chopped ginger. Fry about 1 minute, until fragrant. Add sauce mixture. Bring to a boil and simmer about 2 minutes. Add red pepper flakes and tofu back to mixture, toss to coat. Serve garnished with green onions.

enjoy,

Pin It!

Thursday, October 17, 2013

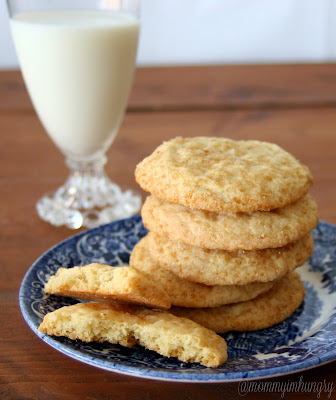
Gluten Free Sugar Cookies, again


Just because you're gluten free doesn't mean you have to go without your favorite sweet treats! Nor do you have to go out and buy them paying a ridiculous amount of money for something that might taste decent or not. If you've been a long time follower of my blog you'll know that I enjoy baking/cooking from scratch and sharing the delicious recipes with you. 

I was craving a simple sugar cookie and found these ones that seemed easy enough and I had all the ingredients on hand. 

These reminded me so much of a glutened sugar cookie I used to make at Christmas time years ago (I think it was a Betty Crocker recipe), then I realized I made this recipe last Christmas, geeze my mind is starting to go! So here they are in day to day form. 


Gluten Free Sugar Cookies
slightly adapted from Serious Eats/Elizabeth Barbone

Dry Ingredients
2 cups white rice flour
1/3 cup cornstarch
1/3 cup sweet rice flour (aka Mochiko)
1 teaspoon baking soda
1/2 teaspoon xanthan gum
1/2 teaspoon salt

Wet Ingredients
1 3/4 cups granulated sugar
1 cup (2 sticks) butter, softened
3 teaspoons vanilla extract
2 large eggs
Coarse sanding sugar, about 1/2 cup (I used a blend of regular and turbinado sugar)

Preheat oven to 350 degrees F. Line baking sheets with parchment paper.
In a medium mixing bowl, whisk together all the dry ingredients. Set aside.
In a large mixing bowl, cream together sugar, butter, and vanilla, about 1 minute.
Add eggs, one at a time, and mix until well combined.
Reduce speed to low and add the dry ingredients. Mix for 45 seconds.
Chill dough for 15-20 minutes.
Roll dough, about 2 tablespoons each, into a ball. Roll dough ball into the sanding sugar. (To make this step go faster, I use a small cookie scoop.)
Place coated dough ball onto prepared baking sheet. Be sure to space cookies about 2 inches apart. Flatten cookies very slightly with the bottom of a glass.
Bake cookies, about 12-15 minutes, or until lightly golden brown.
Remove cookies from the oven and allow to cool for 3 minutes on the baking sheet. After 3 minutes, transfer cookies to a wire rack to cool.
Store cookies in an airtight container. I keep mine in the freezer so they last longer.


 enjoy,

Pin It!

Friday, September 27, 2013

None of This or None of That Peanut Butter Oatmeal Cookies


That's right! No oil, no flour, no eggs, and no added sugar in these cookies! I have been eyeing these cookies for a short time now, but always forgot to get an ingredient so I kept putting them off. Well no more! I finally had everything on hand and whipped these up. My kids loved them! They smell wonderful baking too.

You can also make them gluten free using gluten free oats. Also you could probably use another nut butter if you're allergic to peanuts.


Peanut Butter Oatmeal Cookies
from The Skinny Fork, gave me about 28 cookies

2 Ripe Bananas, mashed
1/3 C. Creamy Peanut Butter
2/3 C. Unsweetened Applesauce
1 Tsp. Vanilla
1/2 Tsp. Salt
1/2 Tsp. Cinnamon
Dash of Ground Cloves
Dash of Ground Nutmeg
1 1/2 C. Quick or Old Fashioned Oats
1/4 C. Nuts, chopped
1/4 C. Semi Sweet Chocolate Chips
1/4 C. Unsweetened Shredded Coconut

Directions: Preheat the oven to 350 degrees F. Line a baking sheet with parchment paper and set aside.
Mix together the bananas, peanut butter, applesauce, vanilla, and spices. Add in the oats, nuts, chocolate chips, and coconut; stir until well combined. Spoon a rounded 2 tbsp. ( I just use my small scooper = 1TBL per cookie) of the cookie mixture onto the lined baking sheet, leaving an inch or two between each and flatten slightly. Bake for 20-30 minutes and allow to cool slightly.


 enjoy,
Pin It!

Tuesday, September 17, 2013

Lemon Cream Pie


...make a lemon cream pie! A neighbor of ours, gave us a 10 pound bag of their lemons fresh from their tree. Wow! Immediately the kids wanted me to make lemonade. Well I knew it wouldn't take all of these lemons so what else could I make? I've made lemon bars last time with all of my lemons so I wanted something different. PIE! I found this recipe and it sounded great. I used my gluten free pie crust recipe and decided to use my tart pan instead (I love that it's easier to remove the slices). I also opted for a chilled pie because our oven heats up this little house so the less time I have to use it, the better. You do use a pre baked pie crust though, but it doesn't take too long in the oven.

This pie is just wonderful!! It's cold, creamy, fluffy and melts in your mouth. I really loved it. It's not too tart, it's perfect. A perfect end to Summer and to welcome Fall. Oh, and yes I made them lemonade, and I'll blog that soon too. 


Lemon Cream Pie
adapted from Welcome Home 

1 pie crust recipe, pre baked and cooled (gluten free recipe here)
1 cup sugar
3 1/2 tablespoons cornstarch
2 tablespoon grated lemon zest
1/4 cup fresh lemon juice
3 egg yolks slightly beaten
1 cup whole milk
1/4 cup frozen butter, cut into small cubes
1 cup sour cream

Combine sugar, cornstarch, lemon zest, lemon juice, egg yolks and milk in saucepan, and cook over medium heat until thick (should take a few minutes). Stir in the frozen butter until melted, remove from heat and let cool to room temperature. Stir in the 1 cup of sour cream and pour into baked pie shell. Chill 6 hours or more, top with whipped cream before serving.


enjoy,

Pin It!

Monday, September 2, 2013

Quinoa Spring Rolls


Quinoa is still a grain that I am trying to get used to liking since the last few recipes I've tried haven't been so great. I've had this recipe in my pinterest folder for some time now and thought this weekend was the perfect time to try them! I recently went back to work (sorry my blog is far behind!) and sometimes I get to take lunch breaks. This was lunch this past weekend. I am so glad I gave this recipe a try, because it is now a keeper. I love asian foods, flavors and egg rolls so these were perfect.

I made these spring rolls up the night before and was a little worried they would turn soggy, but happily they held up so well. I even rolled them between pieces of wax paper so they wouldn't stick together. The flavors was fantastic in these and I loved the quinoa.


Quinoa Spring Rolls
adapted from The Healthy Haven Blog

1 cup cooked quinoa
1/4 cup or so of each: bean sprouts, grated carrots, shredded cabbage, sliced green leaf lettuce
6 rice paper wrappers

 Dressing:
 2 Tbs. seasoned rice vinegar
 2 Tbs. soy sauce (or Tamari for gluten free)
 1 tsp. minced garlic
 1 Tbs. minced ginger
 2 tsp. sesame oil

Combine the quinoa and all the veggies in a medium bowl. In another small bowl, combine dressing ingredients and then toss with quinoa and veggie mix, set aside.

Before assembling the spring rolls, fill a pie dish with warm water. Then soak a wrapper for 30 seconds or until it begins to soften. Don’t let it sit for too long because it will soften too much and fall apart. Place the wet rice wrapper on a plate and add a couple of tablespoons of quinoa veggie mixture. Fold the edges over and roll into a spring roll. Repeat by soaking another rice wrapper and wrapping it. Keep going until all the filling has been used. Eat right away or roll between pieces of wax paper and refrigerate.

Dressed quinoa and veggie mix

let's eat!


 enjoy,

Pin It!

Friday, July 19, 2013

Homemade Gluten Free Pasta


I am so glad to have finally tried making pasta from scratch. Gluten free pasta even!! This recipe is so easy once you've made it you'll think "that was it??" Best of all it tastes so much better than any boxed brand, fresh is always better though, isn't it? I know my kids like it, but I finally got Mr. to try it and even he loved it more than the boxed gluten pasta!

I have had to adapt this recipe because I just cannnot get the dough to come together by hand on the counter top. I have also had to add an extra egg or two plus some oil for it to come together, using my mixer. In the end it came out lovely, and the dough is very workable but I doubt it would work in a pasta roller, so this is really made by hand! I can get 3-4 servings out of this (being diabetic I can't have a big bowl of pasta).


My Grandma's Italian Noodles

Homemade Gluten Free Pasta
adapted from No Gluten, No Problem, serves 2-4

1 1/2 tsp Xanthan Gum
2-4 eggs (depends on your dough)
Drizzle of olive oil

In a stand mixer combine the flour and xanthan gum on a medium speed, then slowly add in 2 eggs and drizzle in the oil. The dough will turn to a dry sandy stage, if it doesn't seem to come together and look like dough, slowly add another egg and a little oil (depending on how it works for you, you may need up to 4 eggs). Once the dough combines and "cleans the bowl" it is ready.

Cut dough into two pieces, cover and let it rest up to 10 minutes. Roll out as thin as you can and cut pasta into desired strips (see below). Allow cut pasta to dry out, up to 10 minutes then it's ready to boil or place in the fridge, covered until ready to cook (up to a couple of days). Let boil about 10-15 minutes, or until your desired doneness. (mine seems to take the longer 15 minutes)

I have to mix min in the stand mixer. Roll out onto counter as thin as you can get it, then slice into desired pasta shape (usually a thin fettucini/spaghetti or lasagna sheets)

After rolling out, you can either roll it up like a log and slice circles and then unroll each little circle to make pasta strips, or roll it out and slice thin strips, or roll it out and cut large lasagna sheets like I have.

I have made this pasta a handful of times, using it for Lasagna, Cajun Chicken Pasta and my Spaghetti and well pretty much any pasta dish lately.


Please share this post if you liked it. =)

enjoy,

Pin It!

Monday, June 17, 2013

Nutty Caramel Popcorn


This Father's Day I knew what to send for my Dad's gift! Caramel Popcorn they once loved when I made it 11 years ago. So I pulled this recipe out and gave it a whirl again. Now I have changed the original recipe a little, I've added more popcorn and lots more nuts and doubled the caramel sauce. I'm glad I made a big batch because we couldn't keep our hands out of it. See a quick video of me making this on keek (sorry I don't have Vine).

Happy Father's  POPS Day Dad, we hope you enjoyed your treat! :)


Nutty Caramel Popcorn
adapted from FoodNetwork.com

2 cups popcorn kernels, freshly popped
2 cups lightly salted, roasted peanuts
2 cups pecans
2 cups cashews
2 1/2 cups (packed) golden brown sugar
1/2 cup unsalted butter
1/2 cup light corn syrup
4 teaspoons vanilla extract
1 teaspoon salt
1/2 teaspoon baking soda 

Preheat oven to 250 degrees F. Generously butter heavy large baking pan (I just used my silpat liners in two large rimmed baking sheets). Mix warm popcorn and nuts in prepared pan. Place in oven while preparing syrup.

Combine brown sugar, butter and corn syrup in heavy medium saucepan. Whisk over medium-low heat until sugar dissolves and butter melts.

Attach clip-on candy thermometer to side of pan. Increase heat to medium-high and boil without stirring until thermometer registers 255 degrees F, occasionally brushing down sides of pan with wet pastry brush, about 4 minutes (mine took just a little longer, watch it!).

Remove from heat. Stir in vanilla extract, salt and baking soda (mixture will bubble). Gradually pour syrup over popcorn and nuts completely. Stir popcorn and caramel together a little.

Bake until caramel feels dry, stirring frequently (about every 25 minutes), about 1 hour 30 minutes. Remove from oven. Using metal spatula, scrape mixture from bottom of pan to loosen. Cool completely in pan.

(Can be prepared 1 week ahead. Store in airtight container at room temperature.)

hot air popped plain popcorn

almost finished baking away


Please share this post if you liked it. =)

enjoy,
Pin It!

Friday, June 14, 2013

Carrot Rice Pilaf


Here's a great side dish to go with your favorite entree. It's a nice change from boring plain rice. Mr. loves this rice, the carrots naturally sweeten it up and make it extra tasty. It's one I can make often since the ingredients are simple and almost always on hand.  Give this recipe a try this week!


Carrot Rice Pilaf
slightly adapted from Grimmway Farms 

1 cup shredded carrots
1 onion, diced
1 Tbsp. unsalted butter
1 cup long grain rice, uncooked
1 (14.5–oz.) can low sodium chicken broth (gluten free)
1 tsp. lemon pepper seasoning

In a large skillet, saute carrots and onion in butter until tender. Add rice and stir to coat. Stir in broth and lemon pepper. Bring to a boil. Reduce heat. Cover and simmer for 20 minutes or until rice is tender.


Please share this post if you liked it. =)

enjoy,
Pin It!

Wednesday, June 12, 2013

Candy Cookie Bars


Summertime has come to our home and these colorful fun cookie bars would sure add smiles to my kiddos faces. We've got a busy summer ahead, as we move homes/towns and change schools (never really fun) but here we go! Cookies to cheer us up I think! They loved these, actually they loved the huge sheet of cookie! This would also be fun to decorate and write in frosting for a birthday cookie-cake.


Candy Cookie Bars
slightly adapted from Fearless Homemaker

2 1/8 cups all-purpose flour
1/2 teaspoon salt
1/2 teaspoon baking soda
1 1/2 sticks unsalted butter, softened
1 cup brown sugar, lightly packed
1/2 cup white sugar
1 large egg
1 large egg yolk
2 teaspoons vanilla extract
1 12oz bag M&M’s, divided

Preheat the oven to 325 degrees. Line (with foil or parchment) an 11x17" edged baking sheet and set aside. In a medium sized bowl, whisk together the flour, salt and baking soda; set aside. In a large bowl, beat the butter and sugars until light and fluffy. Add the egg, egg yolk and vanilla and mix well. Using a rubber spatula, fold the dry ingredients into the egg mixture until just combined; do not overmix. Fold in 1 cup of M&M’s and  turn the batter into the prepared pan, smoothing the top with the spatula. Sprinkle the remaining M&M’s on top and press in slightly. Bake 20-25 minutes, until the top of the bars is light golden brown, slightly firm to the touch, and edges start pulling away from sides of pan. Cool completely before cutting.


Please share this post if you liked it. =)

enjoy,
Pin It!

Tuesday, June 4, 2013

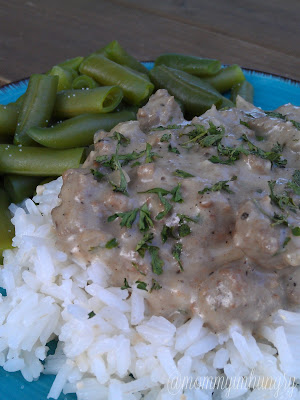
Gluten Free Beef Stroganoff (GF Cream of Mushroom Soup & GF Gravy)


This is one of our go to meals, it's budget friendly using ground beef instead of pricey cuts of steak. My family loves this and really loved it last night, they ate it all! This recipe may seem familiar because I have blogged it back in the day but today I am sharing it with you again, gluten free style and with homemade ingredients. Don't be scared, it's really easy to make, and the soup and gravy are done in no time at all, they could also be made ahead of time and chilled. Make up a batch of that gluten free flour blend to keep on hand, you'll need a little for this recipe. Feel free to serve over gluten free pasta if you wish. 


Gluten Free Beef Stroganoff
adapted from Mommy's Kitchen, serves about 8

1 lb. ground beef
1 small onion, diced
Salt & pepper (to taste)
1 TBL crushed garlic
1 tsp onion powder
Cream of mushroom soup (gluten free recipe below)
Beef gravy (gluten free recipe below)
1 cup sliced fresh portabella mushrooms
1/4 cup sour cream
3 TBL parsley
Cooked rice (I would cook up 2 cups of rice for 8 ppl)

Brown & cook ground beef with chopped onion, salt, pepper, garlic and onion powder in a skillet.  Drain of excess grease, return meat to pan. Add the cream of mushroom soup, gravy and mushrooms, mix together and simmer over low heat about 10 minutes. Add the sour cream and parsley, mix until thoroughly blended. Serve over cooked hot rice.


Gluten Free Cream of Mushroom Soup 
from my blog

3 TBL butter
1/2 cup fresh mushrooms, diced
3 TBL gluten free all purpose flour blend
1/4 teaspoon salt
1/4 teaspoon pepper
1/4 tsp onion powder
1/4 tsp garlic powder
1-1/2 cup milk, warmed

Melt butter in large skillet add in mushrooms and cook for a couple of minutes. Stir in flour and seasonings. Cook over medium heat for just a minute. Add milk slowly, stirring with wire whisk. Cook until just about thick. Makes 1 1/2 cups or 1 can of condensed soup. Use all this in this stroganoff recipe.


Gluten Free Beef Gravy

1 cup water
1 tsp Better Than Bouillon beef base
2 TBL gluten free all purpose flour blend
1/8 teaspoon salt
1/4 teaspoon pepper
1/4 tsp onion powder
1/4 tsp garlic powder
1 TBL parsley
1/2 TBL butter

In a large skillet, heat the water and beef base. Whisk in flour and seasonings and heat until it thickens up. Add in butter and let it melt. Use all this in this stroganoff recipe.

made in no time at all!

add in the gravy, soup and mushrooms, simmer away

I steamed my rice with some chopped garlic


Please share this post if you liked it. =)

enjoy,
Pin It!
Related Posts Plugin for WordPress, Blogger...