Sunday, March 25, 2012

Fruit and Nut Bars


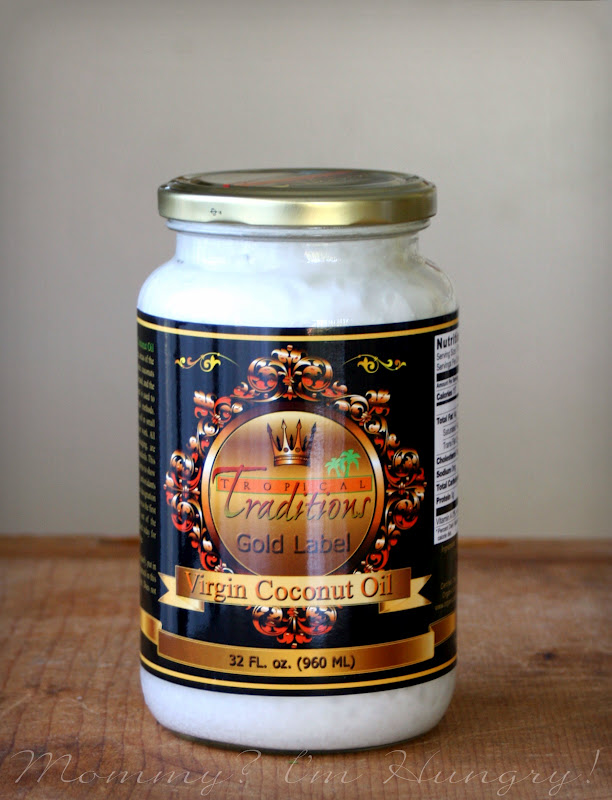
 I was accepted to do a review on Tropical Tradition's Gold Label Virgin Coconut Oil, and being somewhat familiar with it and knowing how good it is for you, I was excited to try it out. My good friend Faye led me to these bars from Civilized Caveman Cooking. I've been reading George's blog for a while now and knowing he's Paleo, fit and in good health and also creates his own recipes I thought I'd try these out. This coconut oil does have a coconutty scent so it's probably best used in baking (and skin care and more)and not an everyday cooking oil. You'd want expeller pressed coconut oil for that. Anyways, it melted very quickly and was great in this recipe.

They say these are similar to Lara bars. The main ingredient is dates, and their stickiness helps keeps these bars together. Try to use unsweetened dried fruits, the dates are sweet enough. I pressed mine into a 9x9 pan and cut in rows of 4x4 then wrapped each piece up to have throughout the week. I have to say, these are pretty good. I usually have one after my workout. I didn't add much cinnamon and the flavor got lost in the coconut flavor, so add more if you like, or other spices. Play around with dried fruit and nuts, whatever you like.


Fruit and Nut Bars
adapted from Civilized Caveman Cooking
2 Cups Dates, pitted (about 12 oz)
3/4 Cup Raw Almonds
1/4 Cup Dried Apples
1/4 Cup Dried Apricots
1/4 Cup Unsweetened Shredded Coconut (Bob's Red Mill)
2 Tbsp Coconut Oil, melted
1/4 tsp. Cinnamon (more to your taste)

In a small skillet roast almonds, stirring until just golden, you can hear them start to sizzle and smell when they are about done. Watch you don't let them burn.
Place your dates and 1/2 C. almonds in a food processor. Pulse until they are in small chunks or how you prefer and transfer to a mixing bowl.
Add you 1/4 Cup almonds, apples and apricots to the processor and pulse until you have small chunks. Add to the mixing bowl.
Add all remaining ingredients to your bowl. Using your hands mix well to ensure an even coating of everything.
Once mixed, line a 8x8 baking dish with parchment and add the fruit and nut mixture. Flatten out then place in refrigerator to cool, cut and enjoy. Wrap the remaining pieces in plastic wrap and keep chilled for later.


I pulsed mine pretty good.


chunks of apple and coconut can be seen

Sharing with
Allergy-Friendly Friday with Cybele Pascal

enjoy,

Pin It!

Wednesday, March 21, 2012

Chicken Poblano Casserole


This was a great dinner, it reminded me of a Mexican lasagna or enchiladas and instead of pasta, corn tortillas. Now there is a little work to these so be sure to have a free afternoon, or maybe you could prep the peppers, sauce and cooked chicken the day before? You'll need to roast and peel the peppers, but don't worry it's easy. Add some verde salsa and a little sour cream and yum.


Chicken Poblano Casserole {Gluten Free}
adapted from Noble Pig and Cooking Light

3 poblano chiles
1 large red bell pepper
3 ears shucked corn (I used 1 1/2 C. frozen)
1/3 cup all-purpose Gluten Free flour Blend
1 teaspoon salt, divided
1/4 teaspoon freshly ground black pepper
3 1/2 cups 2% low-fat milk
3 cups (12 ounces) preshredded reduced-fat 4-cheese Mexican blend cheese, divided
1/3 cup chopped red onion
1/3 cup chopped fresh cilantro
2 large eggs, lightly beaten
1 (15-ounce) carton part-skim ricotta cheese
Cooking spray
18 (6-inch) white corn tortillas
3 3/4 cups chopped cooked chicken breast (about 3 large)
1 cup thinly sliced green onions, divided


Preheat broiler.
Cut poblanos and bell pepper in half lengthwise; discard seeds and membranes. Place poblanos and bell pepper, skin sides up, on a foil-lined baking sheet; flatten with hand. Place corn on baking sheet (if using frozen, just mix in later). Broil 10 minutes or until poblanos and bell pepper are blackened and corn is lightly browned. Place poblanos and bell pepper in a zip-top plastic bag; seal. Let stand 10 minutes. Peel and coarsely chop; set poblanos and bell pepper aside separately. Remove corn kernels from cobs.

Lightly spoon flour into a dry measuring cup; level with a knife. Place flour, 1/2 teaspoon salt, and black pepper in a large saucepan. Gradually add milk, stirring with a whisk. Cook over medium heat until slightly thick (about 12 minutes), stirring constantly. Remove from heat. Combine 1 cup milk mixture and poblanos in a blender; process until smooth. Stir pureed poblano mixture into remaining milk mixture.

Preheat oven to 350°.
Combine bell pepper, corn, remaining 1/2 teaspoon salt, 1 cup Mexican cheese, red onion, cilantro, eggs, and ricotta.

Coat bottom of a 13 x 9-inch baking dish with cooking spray. Spread 1/2 cup sauce in bottom of dish. Arrange 6 tortillas over sauce, overlapping slightly. Spread half of ricotta mixture over tortillas; top with half of chicken. Sprinkle with 1/3 cup green onions and 2/3 cup Mexican cheese. Pour about 1 cup sauce over cheese. Repeat layers with 6 tortillas, remaining ricotta mixture, remaining chicken, 1/3 cup green onions, 2/3 cup Mexican cheese, 1 cup sauce, and 6 tortillas. Pour remaining sauce over tortillas. Coat 1 side of foil with cooking spray. Place foil, coated side down, over casserole. Bake at 350° for 30 minutes or until bubbly.

Uncover; sprinkle with remaining 2/3 cup Mexican cheese and 1/3 cup green onions. Bake, uncovered, 15 minutes or until cheese melts. Let stand 15 minutes.


enjoy,

Pin It!

Tuesday, March 20, 2012

Layered Jello Knox Blocks


For the 3rd grade St. Patrick's Day class party I offered to bring in green jello. But not just jello. Knox Blocks. Who remembers them as a kid? I do, and loved them. They are sturdier than the jello jigglers you may know of these days. This time I thought I'd try them with a cream layer in them. I call them Magical Shamrocks. They are the easiest thing to make, and they set up pretty quickly, but I kept mine overnight. Just think of the different flavors and shapes you could make these into. Raspberry, strawberry or cherry hearts for Valentines, grape, lime or strawberry for Easter eggs, cherry or lime for Christmas time...

As I was cutting these out the next morning, I kept catching myself nibbling on the scraps, oooh they were good. I am not crazy about that  gelatin stuff, but these were good. My kids loved them. I don't know how they went over at school, since my little girl was sick the day of her party, but most of what I sent was gone when I got the dish back.
You  may want to double this for a class of 24+ if you use 2-3" cutters.

Layered Jello Knox Blocks
from Group Recipes

4 envelopes Knox unflavored gelatin
3 pkgs (3oz) Lime Jello
3 Cups boiling water
1/2 pt whipping cream

In large heatproof bowl mix unflavored gelatin with Jello.
Add boiling water and stir until gelatin is completely dissolved -- about a minute or so.
Stir in whipping cream.
Pour into a 13x9 inch pan, cover and chill until firm, about four hours or overnight.
The cream will rise during chilling to form a top layer.
To serve, cut into squares or rectangles of desired cookie cutter shapes and size for finger food treats. Place each piece between cut wax paper, and keep chilled until serving.


enjoy,

Pin It!

Saturday, March 17, 2012

Ginger Glazed Pear Streusel Muffins


Got pears? I sure had more than we could eat but did not want them to go to waste. I found this recipe and decided I would make them for my kids, and freeze some for later. Of course I changed them up a little, adding in some ginger to the muffin batter as well as adding a crumb topping along with the glaze, WOW. They sure smelled heavenly while baking and the kids loved them.

Ginger Glazed Pear Streusel Muffins
adapted from Weight Watchers

2 large pears, ripe, Bosc, with skin
1/2 tsp ground cinnamon
1/3 cups sugar, granulated
1 tsp fresh lemon juice
1/2 cups light sour cream
1 large eggs, beaten
1 tsp vanilla extract
1/3 cups 2% milk
2 cups all-purpose flour
1/2 tsp table salt
1/2 tsp baking soda
1 tsp baking powder
1/4 tsp ground ginger

Crumb Topping:
1/3 C granulated sugar
1/4 C flour
2 TBL butter
2 TBL chopped pecans
-Combine sugar, flour and nuts, cut in butter until resembles coarse crumbs. Set aside.

Glaze:
1/2 cups powdered sugar
1/4 tsp ground ginger
1/4 tsp vanilla extract
3 tsp water, warm, or more if necessary

Preheat oven to 375ºF and coat a 12-hole muffin tin with cooking spray or muffin liners.
Core and chop pears into tiny cubes; place in a large bowl. Add cinnamon, granulated sugar and lemon juice to pears; set aside.

In a small bowl, whisk together sour cream, egg, 1 teaspoon of vanilla and milk; set aside.
In a large bowl, sift together flour, salt, baking soda, baking powder and ginger.
Make a well with a spoon in center of flour mixture and pour in sour cream mixture and fruit mixture, alternating in small batches; mix until barely blended. Do not over beat. (NOTE: Batter will be very thick.)

Drop batter by heaping tablespoons into muffin holes until about 2/3 to 3/4 full; add 1 TBL crumb topping to each muffin, bake until top is golden, about 30 to 35 minutes. Remove from oven and cool for 5 minutes in muffin tin; remove from tins to racks and cool completely.
While muffins are cooling, make glaze: Mix powdered sugar, ginger, 1/4 teaspoon of vanilla and warm water together in a small bowl (add another teaspoon of water if glaze is too thick) . Drizzle a thin layer of glaze over each muffin.


enjoy,
Pin It!

Sunday, March 11, 2012

Shrimp Pad Thai


When friends talk about and post videos of a certain food, you want it. Today it was SHRIMP then Pad Thai. So this was dinner tonight. I've had microwave pad thai before and didn't like it, but this homemade version was SOOO GOOD. It's basically stir fried shrimp and noodles cooked in a garlicky spicy and sweet sauce. I am happy to say that my two little ones, Mr. and I LOVED it, my oldest doesn't like shrimp and said she didn't like the noodles. She's missing out. This recipe is a keeper.


Shrimp Pad Thai {Gluten Free and Diabetic Friendly}
adapted from EatingWell

4 ounces dried rice noodles
2 teaspoons canola oil
3 cloves garlic, minced
1 large egg, lightly beaten
8 ounces small shrimp, peeled and deveined (I cut mine in half)
2 cups mung bean sprouts
1/2 cup sliced green onions
3 tablespoons rice vinegar
2 1/2 tablespoons fish sauce
2 tablespoons sugar (I used 2 Truvia packets)
1 teaspoon chili-garlic sauce (I used 1/4 tsp Sambal Oelek)
2 tablespoons chopped dry roasted unsalted peanuts

Soak rice noodles in warm water to cover in a large bowl until they are limp and white, about 20 minutes. (I went ahead and cooked mine in boiling water for about 4 minutes, drained and rinsed)
Heat oil over high heat in a wok until very hot. Add the garlic and stir-fry until golden, about 10 seconds. Add the egg and cook, stirring, until scrambled, about 30 seconds. Add shrimp and stir-fry until they curl and turn pink, about 2 minutes.

Drain the noodles and add to the wok, tossing with tongs until they soften and curl, about 1 minute. Add bean sprouts, scallion greens, vinegar, fish sauce, sugar and chile-garlic sauce; toss until the shrimp are fully cooked and noodles are heated through, 1 to 2 minutes. Sprinkle with peanuts and serve immediately.

3 servings, about 1 1/3 cups each. For nutrition info see their site.


enjoy,
Pin It!

Friday, March 9, 2012

Grilled Italian Seasoned Veggies


Here's a great idea for a side dish, grilled veggies. I just loved this recipe from Giada, man it smells soooo good. What I did was cut my veggies, add them to a large baggie and add the marinade for a few hours, then grilled them. Be sure to watch them, you don't want them to cook too long or they'll be too soft.


Grilled Italian Seasoned Veggies
from Giada/Cooking Channel

Assorted cut veggies such as, summer squash, bell peppers, mushrooms, asparagus.
1/4 cup plus 2 tablespoons olive oil
Salt and freshly ground black pepper
3 tablespoons balsamic vinegar
2 garlic cloves, minced
1 teaspoon chopped fresh Italian parsley leaves
1 teaspoon chopped fresh basil leaves
1/2 teaspoon finely chopped fresh rosemary leaves

(Giada's directions)
Place a grill pan over medium-high heat or prepare the barbecue (medium-high heat). Brush the vegetables with 1/4 cup of the oil to coat lightly. Sprinkle the vegetables with salt and pepper. Working in batches, grill the vegetables until tender and lightly charred all over, about 8 to 10 minutes for the bell peppers; 7 minutes for the yellow squash, zucchini, and mushrooms; 4 minutes for the asparagus. Arrange the vegetables on a platter. The key to getting those great grill marks is to not shift the vegetables too frequently once they've been placed on the hot grill.
Meanwhile, whisk the remaining 2 tablespoons of oil, balsamic vinegar, garlic, parsley, basil, and rosemary in a small bowl to blend. Add salt and pepper to taste. Drizzle the herb mixture over the vegetables. Serve the vegetables, warm or at room temperature.


enjoy,
Pin It!

Thursday, March 8, 2012

Sesame Orange Beef


Asian cuisine is one of my favorite foods, and even though I eat gluten free/diabetic friendly now, I can still have it. Here is a recipe I found at a diabetic site for Sesame Orange Beef. A great tip for slicing beef, is to let it freeze up for an hour or so. You'll be able to get really thin slices which are great for stir fry recipes, it'll cook in no time at all. We all enjoyed this dish, I hope you'll try it too.


Sesame Orange Beef {gluten free & diabetic friendly}
from Diabetic Living

8 ounces fresh green beans, halved crosswise
2 teaspoons sesame seeds
1/2 cup orange juice
2 tablespoons reduced-sodium soy sauce (GF use tamari)
1 tablespoon toasted sesame oil
1 teaspoon cornstarch
1/2 teaspoon finely shredded orange peel
Nonstick cooking spray
1/2 cup bias-sliced green onions
1 tablespoon grated fresh ginger
2 cloves garlic, minced
1 teaspoon cooking oil
12 ounces boneless beef sirloin steak, thinly sliced
2 cups hot cooked brown rice
2 oranges, peeled and sectioned or thinly sliced crosswise
In a covered medium saucepan, cook green beans in a small amount of boiling water for 6 to 8 minutes or until crisp-tender. Drain; set aside.

Meanwhile, in a small skillet, cook sesame seeds over medium heat for 1 to 2 minutes or until toasted, stirring frequently. Set aside.
For sauce:                
In a small bowl, combine orange juice, soy sauce(tamari), sesame oil, cornstarch, and orange peel; set aside.
Coat an unheated large nonstick skillet with nonstick cooking spray. Preheat over medium-high heat.

Add green onions, ginger, and garlic to hot skillet; stir-fry for 1 minute. Add the precooked green beans; stir-fry for 2 minutes. Remove vegetables from skillet.
Carefully add oil to the hot skillet. Add beef; stir-fry about 3 minutes or until desired doneness. Remove from skillet.
Stir sauce; add to skillet. Cook and stir until thickened and bubbly; cook and stir for 2 minutes more. Return meat and vegetables to skillet. Heat through, stirring to coat all ingredients with sauce. Serve over hot cooked brown rice. Top with orange sections and sprinkle with toasted sesame seeds.
Makes 4 (3/4 cup beef mixture and 1/2 cup cooked rice) servings.

Nutrition Facts Per Serving:
Servings Per Recipe: 4
Calories: 348
Carbohydrate(gm): 41

-for more info see their website


enjoy,

Pin It!
Related Posts Plugin for WordPress, Blogger...